I love a project.
To me it isn’t about achieving perfection as you will see below. It’s about completing a task without cursing, making excuses, and settling back afterward and saying to yourself I can do anything! And if that doesn’t work for you maybe its just fun to create something kinda pretty.
I remember preparing for a big out of town meeting for work years ago and I wanted my stubby nails to look nice. I went to the neighborhood nail salon and thinking I would hear “heck no” asked for a french manicure. I got a “sure” in response to my request and I had the best little manicured fingers when I left the salon. I was trying to recreate that here and it turned out okay.
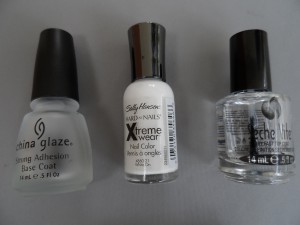
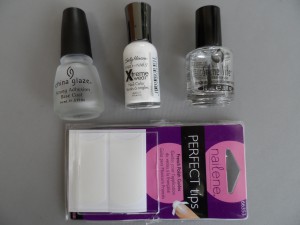
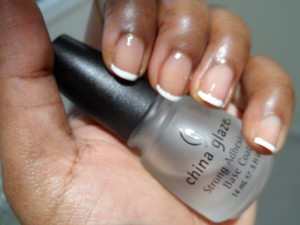
China Glaze Base Coat, Sally Hansen White Out Xtreme Wear, and Seche Vite Top Coat
I thought all I needed were the three items above. I was going to try to be really artsy even though I can’t draw a straight line. You know how they do a non-airbrush french at the salon because they have got talent? They just use the brush to create the white tip and its amazing. Well I thought I could do that and it was a big fat fail. So I went back to CVS and for $2.39 picked up the Nailene Perfect Tips Stickers that I needed. I can work with a sticker! Anyone can.
The steps are easy. I did a base coat on all my nails. I then applied the Perfect Tips stickers to all the fingers on one hand. I used the Sally Hansen White Out Xtreme Wear polish ($3.29) on the tips (two coats) and let it dry and ripped the stickers off. I then put Seche Vite on all my finished fingers. I did the same thing on the other hand after the first hand dries. That’s the biggest thing about this manicure, it takes time. One hand at a time but with Seche Vite it isn’t too bad. That stuff dries fast.
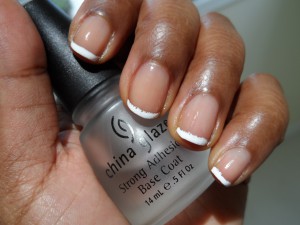
Here are the results. Be kind in your thoughts and expectations.
Clearly I took off the stickers too fast. Only some of the nails are smooth looking.
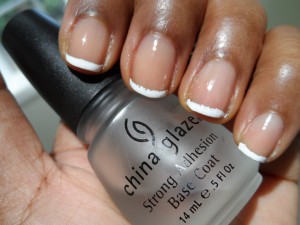
But it looks better the farther away you get. See below! Ha!
I’ll try this again and learn from my mistakes. My first attempt was fun though.
Have you tried this? I’m sure you did better!


I think these look great. I’ve tried this once before by doing the white freehand but it was a big fat fail for me. I may give it a go again with the stickers this time as I think it may be more succesful. x
Your too kind! You made me feel so much better about thinking I could do the white tips freehand though. The stickers are everything and they have three sheets in the package so they aren’t skimping on the stickers which is nice!
My tip to the perfect DIY French manicure is the nail art polishes. You can just lay the brush down flat and kind or just roll your nail underneath. You might give it a shot!
I’ll look for that! Thank you:)
Another really great drugstore item to help with French Manicures is the French Tip pen. I have the Sally Hansen one and it is great! I sometimes do two thin coats on the tip just because it is slightly watery and not very opaque on the first coat (which is good because it rubs off easily if you make a mistake).
I saw that at the store, I am going to def try that too since you like it. Thanks!
Your nails actually look nice. The thin sliver of white is pretty. I’ve tried to do French manicures freehand a couple times but it looked miserable and sad. Will try the stickers. Good on you for braving this project!!
I think they look great. I’ve tried french tip stickers in the past but haven’t lately. I usually keep acrylics on my nails heavily designed or with glitter encapsulated so I don’t do french manis that often.